WebChat for Microsoft Teams — the complete guide
This guide walks you through WebChat end to end: from installing it in Microsoft Teams through opening and testing it in the backend and setting up the incoming channels — website widget, WhatsApp, Instagram — to your own AI with Azure AI Foundry and Power Automate. Every channel lands in real time in the right Microsoft Teams channel. Pay per Channel, set up in minutes.
▶Find everything about WebChat in this video (12 min)How WebChat works: a request via the website widget is routed to the right Microsoft Teams channel — both sides show the same conversation, the team replies with “@WebChat …” straight from Microsoft Teams.
Three building blocks, one platform
WebChat brings every channel into Microsoft Teams. Optionally, add your own AI — orchestrated by Power Automate, answered by a Foundry agent.



Three phases to a productive WebChat
1WebChat & Microsoft Teams
- Add WebChat in Microsoft Teams
- Open & test the backend
- Configure WebChat
- Add more administrators
- Troubleshooting

2Set up incoming channels



WebChat & Microsoft Teams
Install, test in the backend, configure and authorize administrators.
Add WebChat in Microsoft Teams
You can search for WebChat directly in Microsoft Teams under “Apps” — or via the Microsoft Marketplace. The app is then assigned to the channel you want.
Search for “WebChat” in the Microsoft Marketplace
Or open the entry webch.at/webchat directly. Billed Pay per Channel instead of per user.
Install the app in Microsoft Teams
On the app detail page in Microsoft Teams, select “Add”.
The WebChat app detail page in Microsoft Teams.
Choose a channel
Choose the Microsoft Teams channel where customer requests should land.
Choose the target channel for incoming requests.
WebChat posts in the Microsoft Teams channel
After installation, WebChat automatically posts its first message in the chosen channel — with a setup card and a “Set up” button.
After installation, WebChat posts in the Microsoft Teams channel for the first time (recreation).
Open & test the backend
You manage channels and settings in the WebChat backend — signed in via Microsoft Entra (SSO). Test the full round trip to Microsoft Teams and back.
Open the backend via SSO
webchat.inwebco.com — sign in via Microsoft Entra, no separate credentials.
Choose a channel — you land straight in the LiveTest tab
Open the channel you just created in Microsoft Teams from the channel list. You land straight in the “LiveTest” tab — at the bottom right you'll find your widget, from which you can send a test customer message any time. Just fill in the form, click “Start chat” and write the first message.
After selecting the channel, the “LiveTest” tab opens straight away (backend, desktop view).
Switch to Microsoft Teams
Send a test message in LiveTest and switch to Microsoft Teams: the request appears in real time as a thread in the channel, including a contact card. With “@WebChat message …” you reply to the customer; without a mention it stays internal communication.
In Microsoft Teams: the request as a thread — answered with “@WebChat message …”.
Back in LiveTest: the reply has arrived
The reply from Microsoft Teams appears in the “LiveTest” tab — the full round trip (customer → Microsoft Teams → reply) works.
The reply from Microsoft Teams has arrived in the LiveTest chat.
Configure WebChat
In the “Configuration” tab you adjust the widget's look and behaviour. The channel is already active — every setting is instantly visible in LiveTest.
The “Configuration” tab in the backend — all the channel's settings in one place.
Selected settings in detail
Mode & colours determine the widget's appearance, Quick-Replies offer quick replies on the first message, Typing indicator & inactivity keep the conversation alive, and the start form captures contact data before the first contact.
Mode & colours
Quick-Reply-Buttons
Typing indicator visibility
Start-form field
Text & sender
Font
Add more administrators
By default, only the person who set up WebChat can change configurations. Add more administrators in the “Admin” tab.
The “Admin” tab in the backend with the list of administrators and “Add admin”.
Via “Add admin” enter an email address and save — the person must be a member of the Microsoft Teams channel (access via Entra) and can then change this channel's settings.
Troubleshooting
The most common pitfalls — and how to solve them.
Only “Request approval” instead of “Add”?
🔒
WebChat
Approval by the administrator in the Microsoft Teams Admin Center unlocks WebChat company-wide.
SSO sign-in fails?
Signing in to the backend via Microsoft Entra (single sign-on).
More questions
The widget doesn't appear on the website
Check that the script is placed before the closing body tag and the channel is set to “Active” in the backend. If embedded via Google Tag Manager, publish the container.
WhatsApp or Instagram won't connect
WhatsApp needs a WhatsApp Business account (Meta); Instagram needs a professional/business account linked to a Facebook page. Complete the guided login in the respective tab fully.
The flow won't save
Without a Power Automate Premium license, the premium connectors fail. Assign the license, then save and publish again.
The agent doesn't reply
Check that the agent name and fixed version number in the flow config are correct and the Azure pay-as-you-go subscription is active.
More help & links
Set up incoming channels
Connect the website widget, WhatsApp and Instagram — receive messages and reply directly from Microsoft Teams.
Place the widget on the website
A single script embeds the widget — directly in the source code or, without code access, via Google Tag Manager.
Copy the embed code
In the “Embed” tab, copy the script code to the clipboard.
The “Embed” tab in the backend with “Copy to clipboard”.
Insert before the end of the body
Place the script directly before your website's closing body tag.
Publish & load
Save/publish the page — the widget appears in the bottom right.
The WebChat widget positioned in the bottom right of the website.
Alternative: embedding via Google Tag Manager
Without source-code access, you embed the script as a custom HTML tag in Google Tag Manager.
Open Google Tag Manager
Go to tagmanager.google.com and select your website's container (the GTM container must be embedded on the website once).
Create a new “Custom HTML” tag
In Google Tag Manager: “Tags” → “New” → choose tag type “Custom HTML” and paste the WebChat embed code exactly — including the <script> tags. Leave the “Support document.write” option disabled.
Create a “Page view” trigger & assign it to the tag
In Tag Manager under “Triggers”, create a trigger of type “Page view” and assign it to the custom HTML tag. “All pages” loads the widget site-wide; alternatively, target it with a condition — e.g. “Page URL contains /contact”: then all subpages of that path get exactly this widget.
Preview, test & publish
Use “Preview” to check that the widget loads on the page. Then “Submit” → “Publish” — the widget is live, with no change to the website's source code.
Connect & configure WhatsApp
In the “WhatsApp Business” tab you connect your WhatsApp Business account (Meta) via a guided login.
Open the “WhatsApp Business” tab
In the backend of the desired channel, open the “WhatsApp Business” tab.

The “WhatsApp Business” tab in the backend (desktop view).
Sign in with Facebook
Connect via the WhatsApp Business Manager (Meta). A WhatsApp Business account is required. The pop-up that appears is a process defined by Meta — just follow the steps in the window.
Verify & register the number
Guided flow: login → verification → registration → connected. For verification you receive a call with a code. After that, the number, share link and QR code are ready (see the tab above).
Configure
Adjust the name, number and the “Chat on WhatsApp” button in the configuration area.
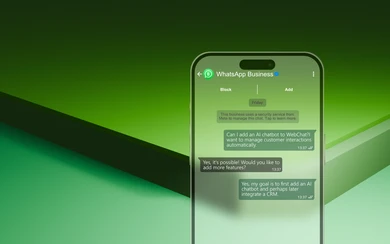
Write a WhatsApp message, reply from Microsoft Teams
Once connected: scan the generated QR code, WhatsApp opens and you can write a message right away — it lands in real time in the right Microsoft Teams channel.
A WhatsApp request is automatically routed to the right Microsoft Teams channel — the team replies to the customer with “@WebChat …”.
Connect Instagram
In the “Instagram” tab you link an Instagram professional/business account.
Open Instagram in the browser & sign in
Sign in to the browser with the desired profile.
Open the “Instagram Business” tab & click “Connect”
In the backend of the desired channel, open the “Instagram Business” tab and click “Connect” — the Meta login starts.
The “Instagram Business” tab in the backend (desktop view).
Link & confirm the account
Confirm access in the Meta dialog — WebChat receives an access token and shows the connected account.
The token stays valid
The token is renewed automatically as long as the account stays connected.
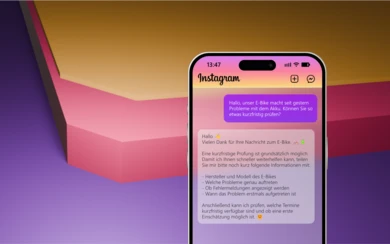
Receive an Instagram DM, reply from Microsoft Teams
An Instagram DM (e.g. a response to an ad) lands in the Marketing channel — answered directly from Microsoft Teams.
Set up your own AI
Create a Foundry agent, control it via Power Automate and test it from all channels.
Create an AI agent
The AI runs as its own agent in your own tenant (ai.azure.com): create a project, create a prompt agent with a model, add web search as grounding, publish.
Create a project
In the Foundry project menu, create a new project (or open an existing one).
Create an agent
Create a prompt agent and choose a model. We recommend a separate agent per channel.
Microsoft Foundry — the agents overview.
Set the system prompt
Define role, tone and escalation rules — e.g. “You are the support agent of company X, reply politely; escalate to the team on purchase intent or complaints.”
Grounding: enable web search
Add web search as grounding and enter allowed domains/URLs (e.g. webchat.cloud) so the agent answers only from your sources — not from general model knowledge.
The “Add web search tool” dialog: connect custom Bing Search with your domains (neutral example names).
Connect knowledge files
Add your own documents (PDF, FAQ, price lists) as a vector store. The tighter the grounding, the more precise and verifiable the answers — the agent cites its sources.
Test in the playground
Before publishing: try the agent directly in the Foundry playground and check how it answers — fine-tune prompt, grounding and tone.
The agent in the Foundry playground: send test requests, check answers and sources.
Publish & note the name/version
Save and publish the agent. Note the agent name and the published version — you need both in Part 10 for the Power Automate flow. Always use a fixed version number, not “latest”.
Configure the control flow
make.powerautomate.com — create connections, set the keyword trigger, paste the flow code as a scope and enter the agent config.
Create connections
Create Microsoft Teams, Content Conversion and Azure AI Agent Service. You get the endpoint for the Azure AI Agent Service in Foundry via the project menu → “Project details”.
The three connections in Power Automate: Microsoft Teams ([email protected] — WebChat posts under this user in Microsoft Teams), WebChat-Foundry-Agents (Azure AI Foundry Agent Service — endpoint from the Foundry project details) and Content Conversion.
In Foundry, under “Project details”, you'll find the project endpoint and the region — enter these in the Azure AI Agent Service connection.
Configure the keyword trigger
“When keywords are mentioned” on the target channel. By default, WebChat sends the keyword pp — don't remove it. To customise it, set your own value in the backend tab “Power Platform” and enter exactly that here as the keyword. The keyword is sent even when you disable its display — so it doesn't appear in every message. Initially the display is deliberately on so the mechanism is visible.
Trigger “When keywords are mentioned”: Message type = Channel, choose the Team and Channels item entry and set the keyword (default “pp”).
The trigger keyword (default “pp”) can be adjusted in the backend tab “Power Platform”.
Paste the flow code
Copy the prepared flow code from webch.at/json. In the designer, below the trigger, right-click the “+” to insert a new action and use “My clipboard” to paste the copied scope — the entire flow (condition → AI agent → Adaptive Card) is inserted with it. Then assign the matching connection to each action.
First download/copy the JSON from webch.at/json. Then, below the trigger, click “+” (or right-click) → “Paste” to insert the complete scope.
Enter the agent config
In the Initialize variable action, enter Config_agent_name and Config_agent_version from Part 9 (fixed version number, not “latest”). Add more nodes via “+” or right-click → “Add action” (e.g. reminder, escalation, hot-lead mention). Finally, save and publish.
Test: start a conversation in LiveTest
Start a test conversation in the “LiveTest” tab — the AI agent replies automatically. The same conversation appears in the Microsoft Teams channel, where the team can take over any time.
LiveTest: the visitor asks — the AI agent (Foundry) answers in real time.
The same conversation runs in the “Support” Microsoft Teams channel — the AI agent replies via @WebChat, the team can take over any time.
Optional: live data as an Adaptive Card
Optionally, you can create more Adaptive Cards in Power Automate and feed them into the conversation — to offer the agent internal information, live data from CRM/ERP or further workflows directly in the Microsoft Teams channel.
Test the agent from all sources
One agent, all channels: trigger requests via the widget, WhatsApp and Instagram and check the behaviour in Microsoft Teams one by one.
Examples: escalation, hot lead & bot control
These behaviours are configured via the workflow config variables in Power Automate (Part 10) — e.g. reminder interval, escalation mention and hot-lead detection.
WebChatEscalationWebChatHot leadWebChatReminderChatbot controlSwitchable per conversation (human-in-the-loop)Checklist
- ✓Reply: Send a test customer message → the agent answers in the channel.
- ✓Escalation: handover is reported to the team, bot disabled, enable card + reminder posted.
- ✓Reactivate: switch the bot back on via the enable card.
- ✓Hot lead: test purchase intent → team mention + lead alert, bot stays active.
- ✓Race test: several messages in quick succession → one answer comes back, no duplicate answers.
An AI support chatbot for Microsoft Teams — without a second inbox
WebChat brings requests from WhatsApp, Instagram, TikTok and the website widget into the right Microsoft Teams channel in real time. Intelligent routing automatically assigns each request to the responsible department — product to support, careers to HR, campaigns to marketing. No tool switching, no second login, no second inbox.
The AI runs as its own Azure AI Foundry agent in your own tenant: no vendor lock-in, full traceability via Microsoft audit logs and human-in-the-loop. Power Automate orchestrates replies, escalation and reminders; Adaptive Cards show live data from CRM and ERP directly in the chat. Permissions and identities come entirely from Microsoft Entra.
WebChat is installed like any Microsoft Teams app directly from Microsoft Teams or the Microsoft Marketplace, and billed Pay per Channel instead of per user — with unlimited users per channel. The basic setup is done in under ten minutes; you then add the AI chatbot via Foundry and Power Automate. All prices at webch.at/pricing.